Exploring Foundation Models Fine-Tuning for Cytology Tasks
Implementation of “Exploring Foundation Models Fine-Tuning for Cytology Tasks”.
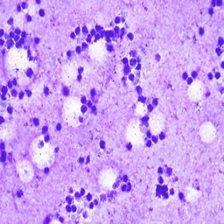
In this paper, we explore the application of existing foundation models to cytological classification tasks, focusing on low-rank adaptation (LoRA), a parameter-efficient fine-tuning method well-suited to few-shot learning scenarios. We evaluate five foundation models across four cytological classification datasets. Our results demonstrate that fine-tuning the pre-trained backbones with LoRA significantly enhances model performance compared to merely fine-tuning the classifier head, achieving state-of-the-art results on both simple and complex classification tasks while requiring fewer data samples.
Authors: M. Dausort, T. Godelaine, M. Zanella, K. El Khoury, I. Salmon, B. Macq
NB: This GitHub repository is based on the implementation of CLIP-LoRA.
Contents
Installation
NB: The Python version used is 3.9.13.
- Create a virtual environment, clone the GitHub repository, and install the required packages:
   python3 -m venv cyto_ft_venv
   source cyto_ft_venv/bin/activate
   pip3 install torch==2.2.2 torchaudio==2.2.2 torchvision==0.17.2
   git clone https://github.com/mdausort/Cytology-fine-tuning.git
   cd Cytology-fine-tuning
pip3 install -r requirements.txt- Download datasets:
- Body Cavity Fluid Cytology (BCFC, kaggle2)
Download BCFC - Mendeley LBC Cervical Cancer (MLCC, kaggle1)
Download MLCC - SIPaKMeD
Download the five folders, decompress and place them into a folder named ‘sipakmed’. - HiCervix
Download HiCervix
Each dataset must be divided into three folders: train, val and test. Images were named following this structure: classname_number.
Important: All file paths in scripts are set with the placeholder “TO CHANGE”. You will need to search for this placeholder in the cloned repository’s files and replace it with the appropriate path /root/path/ as specified for your system. In this setup, we have placed the different datasets inside a folder named ./data.
Usage
To launch the experiments, use the provided launch_run.sh bash script:
- Open the relevant script and locate the required line for configuration (e.g., line 28 for Experiment 1). Uncomment this line to enable the specific settings needed for the experiment.
- Start the experiment by executing the
launch_run.shscript:
bash launch_run.sh- To visualize the changes and track the experiment’s progress, you must integrate your code with Weights & Biases. Add the following line to your script if it’s not already included:
wandb.init(project='your_project_name')You can view the results and metrics of your experiment on Weights & Biases.
- The results of the experiment are also saved into a JSON file for further analysis or documentation.
Experiment 1: Linear Classifier
python3 main.py --root_path ./data/ \
                --dataset {dataset} \
                --seed {seed} \
                --shots -1 \
                --lr {lr} \
                --n_iters 50 \
                --model_name {model_name} \
                --num_classes {num_classes} \
                --level {level} \
                --textual False
Experiment 2: LoRA Few-Shot Adaptation
python3 main_lora.py --root_path ./data/ \
                     --dataset {dataset} \
                     --seed {seed} \
                     --shots {shots} \
                     --lr {lr} \
                     --n_iters 50 \
                     --position "all" \
                     --encoder "vision" \
                     --params "q v" \
                     --r 2 \
                     --model_name {model_name} \
                     --num_classes {num_classes} \
                     --level {level} \
Experiment 3: Pushing Model Fine-Tuning Limits
python3 main_lora.py --root_path ./data/ \
                     --dataset hicervix \
                     --seed {seed} \
                     --shots 0 \
                     --lr 1e-3 \
                     --n_iters 100 \
                     --position "all" \
                     --encoder "vision" \
                     --pourcentage {pourcentage} \
                     --params "q k v o" \
                     --r 16 \
                     --model_name clip \
                     --level level_3 \
Contact
If you have any questions, you can contact us by email: manon.dausort@uclouvain.be, tiffanie.godelaine@uclouvain.be

